
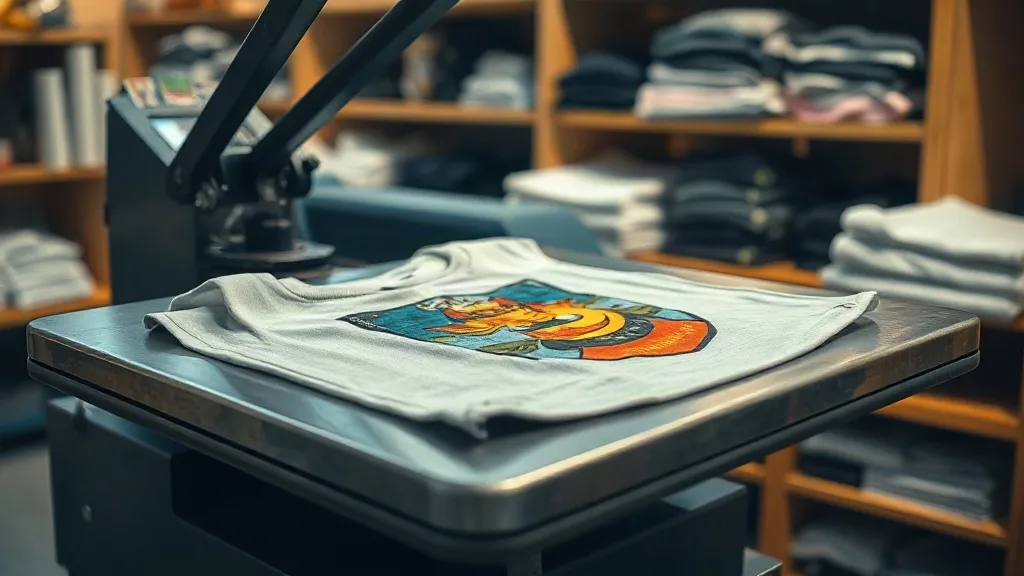
You pull the handle, wait the usual twelve seconds, peel the film, and there it is again: a patch of white ink that didn't stick, or edges that lifted when the shirt cooled. You check the printer, swap the film, maybe even open a new bag of powder. None of it helps. The problem is almost certainly happening at the press, and the press cycle is where most dtf transfers succeed or fail.
This guide is not about printer settings or ICC profiles. It is about the thirty seconds after the transfer meets the shirt, the part of the workflow that receives the least attention and causes the most reprints. If you have been chasing ghost defects for weeks, read on. The fixes are usually simpler than the diagnosis.
Why the Press Cycle Deserves Your Attention
Most dtf troubleshooting advice online focuses on the printer: nozzle checks, ink density, film coating, powder application. Those matter, but they are upstream problems. Once the transfer is printed, powdered, and cured, the press is the only variable left. And unlike the printer, the press gives you almost no feedback. It just applies heat and pressure and hopes you got the settings right.
Shops that run high volumes tend to develop a feel for this. They know that a particular heat press runs hot on the left platen, or that the silicone pad has compressed over time and needs more pressure to compensate. Newer operators do not have that instinct yet, and they often compensate in the wrong direction, increasing temperature when they should be adjusting dwell time, or adding pressure when the problem is actually uneven contact.
Understanding the press cycle as three interacting variables (temperature, pressure, and time) makes diagnosis much faster. Change one variable at a time, observe the result, and you will build a reliable baseline for your specific equipment.
The Three Variables That Control Every Press
Temperature: Hotter Is Not Better
The standard recommendation for DTF is usually somewhere between 300°F and 320°F (150°C to 160°C). That range exists for a reason. Below 300°F, the adhesive powder may not fully melt into the fabric, which leads to poor wash durability and edges that lift. Above 320°F, you start to risk scorching synthetic fabrics, and the film carrier can become difficult to peel cleanly.
What many operators miss is that the temperature reading on your press is not the same as the temperature at the transfer interface. A press that has been sitting idle may show 320°F on the display, but the upper platen surface can be cooler until it cycles. Always let the press recover for a few seconds between presses, especially if you are running a tight production schedule. A 10-degree swing on the platen can be enough to cause inconsistent adhesion across a batch.
Pressure: Even Contact Matters More Than Force
Pressure is the variable most often misunderstood. More pressure does not mean better adhesion. What matters is even contact across the entire transfer surface. If your platen is slightly warped, or your silicone pad has worn down in the center, you can apply plenty of force and still get poor adhesion in specific spots.
A simple test: place a sheet of thermal paper or a piece of plain white paper across the platen, close the press, and check the impression. If the pressure is uneven, you will see darker areas where contact is higher and lighter areas where it is lower. Adjust your pressure knob or replace the pad before you touch temperature settings.
For most DTF applications, medium pressure is sufficient. You want the transfer to make full contact with the fabric without crushing the garment or forcing adhesive through the carrier film. Heavy pressure can actually squeeze the melted powder away from the edges of the design, which leads to the dreaded edge lift after washing.
Time: The Variable That Gets Ignored
Dwell time recommendations for DTF usually fall between 10 and 15 seconds. This is not arbitrary. The adhesive needs enough time to melt and bond, but not so much time that the carrier film begins to distort or the powder over-cures.
If you are running a manual press, consistency is your biggest challenge. It is easy to let a press sit closed for 18 seconds while you answer a question, or to short-change a cycle because you are rushing. A simple timer helps, but the real fix is building a rhythm: load, press, timer starts, timer ends, peel. Once that rhythm becomes automatic, your consistency improves dramatically.
Common Defects and What They Actually Mean
Edges Lifting After Wash
This is the most common complaint, and it almost always points to one of three things: insufficient pressure at the edges, temperature too low, or dwell time too short. Start by checking pressure distribution with the paper test. If contact is even, increase dwell time by two seconds and run a test wash. If the problem persists, raise temperature by 5°F and test again.
One overlooked cause: peeling the film too early or too late. DTF transfers should be peeled warm, not hot and not cold. If you wait until the transfer is completely cool, the adhesive has already set and the peel can pull ink away from the fabric. Peel within a few seconds of opening the press.
Patchy Adhesion or White Spots
Patchy adhesion usually means uneven pressure or moisture in the fabric. Cotton and cotton blends can hold moisture even after pre-pressing, especially in humid environments. Pre-press the garment for 5 to 7 seconds before laying down the transfer. This removes moisture and creates a flat surface for adhesion.
If pre-pressing does not solve it, check your silicone pad. A worn pad can create low-pressure zones that are invisible to the eye but obvious on the finished print.
Scorching or Glossy Marks on Synthetics
Polyester and synthetic blends are sensitive to heat. If you see glossy marks or a change in fabric texture around the transfer, your temperature is too high or your dwell time is too long. Lower temperature by 10°F and reduce dwell time by two seconds. You may need to increase pressure slightly to compensate for the lower temperature, but test carefully.
For very heat-sensitive fabrics, consider a lower-temperature adhesive powder or a transfer film designed for low-temp application. Not all dtf transfers near me suppliers carry these options, so it is worth asking before you commit to a large order.
Building a Press Log That Actually Helps
Every shop should keep a simple press log for each garment type they run. This does not need to be complicated. A spreadsheet with columns for fabric, transfer type, temperature, pressure setting, dwell time, and wash test result is enough. After a few weeks, you will have a reference that tells you exactly what works for each combination.
The log also helps when you bring on new equipment or new operators. Instead of starting from scratch, you have a documented baseline that can be adjusted rather than reinvented.
When to Replace Your Press Pad
Silicone pads compress over time, especially if you run high volumes at high pressure. A pad that has lost its rebound will not distribute pressure evenly, no matter how much you tighten the knob. If you notice that your press log settings are drifting (requiring more pressure or longer dwell time to achieve the same result), the pad is likely the culprit. Replacement pads are inexpensive and take minutes to swap.
Frequently Asked Questions
Can I press DTF transfers on a home iron?
You can, but results will be inconsistent. A home iron does not provide even pressure or reliable temperature control, so adhesion will vary across the design. For occasional personal use it may be acceptable, but for any production work, a heat press is essential.
How long should I wait before washing a DTF-printed shirt?
Wait at least 24 hours after pressing before the first wash. The adhesive continues to cure as it cools, and washing too soon can weaken the bond. After the first wash, turn the garment inside out and use a cool cycle to extend print life.
Why do my transfers look dull after pressing?
Dullness usually comes from over-pressing. If the temperature is too high or the dwell time too long, the top layer of ink can become slightly distorted, which reduces shine. Lower temperature by 5 to 10°F and check the result. Also ensure you are using the correct side of the film; pressing the carrier side down will ruin the transfer.
Do I need different settings for light and dark garments?
The press settings are generally the same, but dark garments can show edge lift more clearly because the white ink layer contrasts with the fabric. If you are seeing edge lift on dark shirts, check pressure distribution first, then increase dwell time by one or two seconds.
How often should I calibrate my heat press?
Check calibration every few months, or whenever you notice inconsistent results. An infrared thermometer can help you verify that the platen is reaching the displayed temperature. If the press is off by more than 10°F, adjust your settings accordingly or have it serviced.