UV DTF color bleed troubleshooting is essential for maintaining vibrant, durable graphics on fabrics and hard surfaces. When color bleed, fading, or misprints threaten a design, a structured approach helps you diagnose and fix issues quickly. This guide highlights DTF color fading causes and DTF misprint solutions, and it addresses UV ink curing issues to help you locate the root of the problem. By following a proven workflow—calibration, curing dynamics, and color management—you can prevent bleed and keep prints sharp. This practical reference can scale from small runs to production lines.
In broader terms, this issue can be framed as a color integrity challenge within UV-powered print workflows. Other expressions you might hear include color migration, haloing, edge bleed, or ghosting on treated media. Key drivers include ink-set compatibility, photoinitiator performance, light exposure consistency, substrate absorption, and mechanical alignment, all of which align with ideas found in comprehensive color management and print quality guides. Addressing these factors with precise color profiling, consistent pretreatment, and repeatable curing procedures reduces variability across jobs. By thinking about ink chemistry, curing dynamics, and mechanical alignment, you sculpt a resilient workflow that minimizes surprises on press.
UV DTF color bleed troubleshooting: diagnosing root causes and actionable fixes
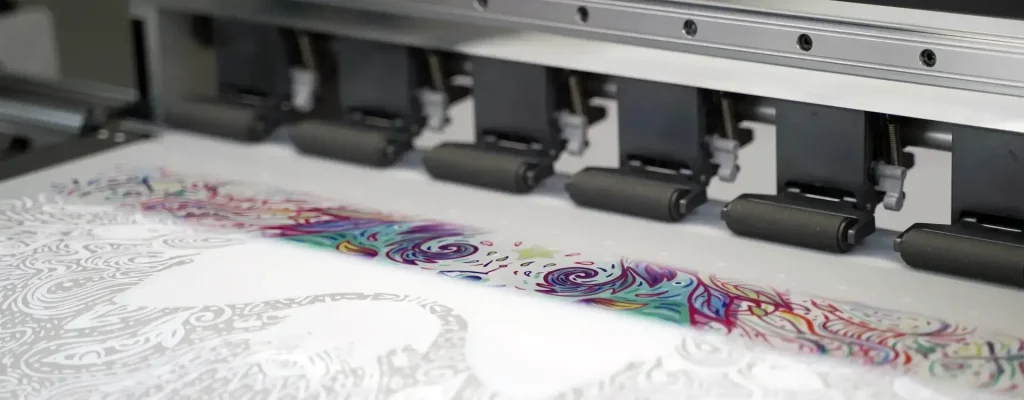
Color bleed in UV DTF printing happens when ink spreads beyond intended edges, creating halos and blurred lines. In this guide to UV DTF color bleed troubleshooting, start by recognizing that root causes usually cluster around ink-substrate compatibility, curing dynamics, printer maintenance and color management, and the transfer process. Understanding how these elements interact helps you pinpoint whether the problem comes from UV ink curing issues, misalignment, or a poorly chosen pretreatment. You’ll often see references to DTF color fading causes and DTF misprint solutions in related troubleshooting discussions, underscoring the need for a system-level check.
To move from symptom to solution, map your workflow from ink formulation through post-processing. Identify whether the substrate absorbs too much ink, if curing is too slow or uneven, or if the transfer film is mis-timed with the print. This approach aligns with the DTF printing troubleshooting guide’s emphasis on diagnosing the chain: ink, substrate, curing, and transfer steps. By framing the issue as UV DTF color bleed troubleshooting, you set a clear target for corrective actions that improve edge fidelity and color integrity.
Ink and substrate compatibility for stable DTF color reproduction
Achieving consistent color starts with ink chemistry and substrate selection. Incompatibilities between UV-curable inks and fabric or film substrates can cause edge diffusion, color shifts, and reduced durability. This section emphasizes how DTF color fading causes often arise when ink sets do not match substrate porosity or surface energy, making proper compatibility testing essential before full runs.
Create a compatibility matrix that pairs ink types with specific substrates and pretreatment levels. Run small test prints across multiple fabrics or films to observe pigment behavior, adhesion, and washfastness. Documenting results builds a practical playbook that aligns with the DTF printing troubleshooting guide while reducing waste and rework.
Curing dynamics and UV ink curing issues: achieving consistent hardening
Curing dynamics are central to print stability. The distance to the substrate, lamp output, and conveyor speed determine how thoroughly UV inks set. When UV ink curing issues occur, you may see muted colors, halos at edges, or brittle coatings after drying. Addressing these factors is a core concern of any robust UV DTF color bleed troubleshooting effort, because proper curing locks in color and sharpness.
Treat curing as a controllable process: calibrate lamp intensity, verify the age and performance of curing lamps, and confirm the recommended substrate-to-lamp distance. Incorporate ongoing belt speed checks and post-cure validation to ensure consistent results across batches. With consistent curing, color fidelity and edge definition stay intact, minimizing bleed and fading risks.
DTF color fading causes: triggers, prevention, and repair strategies
Fading after curing is often tied to under-curing, over-curing, substrate interaction, or heat exposure during post-processing. Understanding DTF color fading causes helps you distinguish between temporary color loss and permanent pigment shift. This awareness guides better decisions about exposure times, heat management, and material compatibility to preserve vibrancy.
Prevention focuses on balanced curing, stable materials, and controlled post-processing. Use matched ink sets and substrates, verify exposure settings, and perform periodic colorimetric checks during runs. When fading does occur, implement corrective steps such as adjusting curing parameters and revalidating color profiles to restore longevity and maintain customer expectations.
DTF misprint solutions: alignment, color management, and film handling
Misprints are often the result of registration errors, color misalignment, or inconsistent transfer film handling. This section highlights effective DTF misprint solutions, including precise registration, verified color profiles, and synchronized film timing with the print. These fixes align with common themes in the DTF printing troubleshooting guide and contribute to repeatable production quality.
Practical steps include calibrating printhead alignment, validating substrate loading squareness, and ensuring film tension remains consistent throughout the transfer process. Adopting standardized workflows for film handling and adhesion can dramatically reduce ghosting and color shifts, enabling reliable reproduction for small orders and scale-up runs.
DTF printing troubleshooting guide: practical checklist, workflows, and testing
A structured approach to troubleshooting turns chaos into repeatable results. This section outlines a practical DTF printing troubleshooting guide that emphasizes systematic checks, controlled testing, and documentation. By adopting a repeatable workflow, operators can quickly isolate whether ink, substrate, curing, or transfer steps are the root cause of color bleed or misprints.
Begin with a standardized kickoff: run calibration and nozzle checks, verify color profiles, test pretreatment uniformity, and perform a controlled print with a color ramp. Maintain a living log of settings, results, and adjustments to build a robust playbook. Regular testing and iterative optimization ensure ongoing color fidelity, edge sharpness, and reliable adhesion across production runs.
Frequently Asked Questions
What is UV DTF color bleed troubleshooting and what are the main causes including DTF color fading causes?
In UV DTF color bleed troubleshooting the first task is to identify the root causes. Common causes cluster around ink and substrate compatibility, curing dynamics, printer maintenance and color management, and the transfer process. DTF color fading causes often come from under or over curing, ink and substrate mismatch, or heat effects. Practical steps include verifying materials, confirming printer profiles and nozzle health, inspecting pretreatment, running a controlled test, and adjusting cure parameters as needed.
How do UV ink curing issues contribute to UV DTF color bleed troubleshooting and how can you resolve them?
In UV DTF color bleed troubleshooting the issue of curing is central. Check lamp output and age, distance from the substrate, and conveyor speed to ensure proper curing. Use the recommended film and substrate and test with a small design after adjusting cure settings to confirm improvement.
What are common UV DTF color bleed troubleshooting misprints and how do DTF misprint solutions address misregistration and color shifts?
In UV DTF color bleed troubleshooting misprints show as misregistration, color shifts, or ghosting. DTF misprint solutions focus on precise registration, validated color profiles, and compatible pretreatment and transfer films. Verify alignment, refresh color profiles, and run controlled tests before larger runs.
How does color management influence UV DTF color bleed troubleshooting and what practical steps help?
In UV DTF color bleed troubleshooting color management is essential. Maintain nozzle health and use the prescribed ink set. Verify ICC profiles and device color management, then perform test prints to ensure color relationships stay within tolerance and adjust if needed.
What is the recommended troubleshooting workflow in UV DTF color bleed troubleshooting to prevent misprints?
In UV DTF color bleed troubleshooting a practical workflow starts with materials and nozzle calibration, then color profile validation, pretreatment inspection, and curing parameter tuning. Follow with a controlled test print and iteration of adjustments before scaling production. Document each change to build a reliable playbook as in a DTF printing troubleshooting guide.
When should you seek expert help for UV DTF color bleed troubleshooting?
In UV DTF color bleed troubleshooting you should escalate when persistent symptoms remain after following the standard workflow. Contact the printer manufacturer support or a color management specialist for a deeper review of hardware firmware, ink chemistry, and media compatibility. This approach is often recommended in a DTF printing troubleshooting guide.
| Key Area | Summary |
|---|---|
| Overview of UV DTF color bleed troubleshooting | Involves diagnosing color bleed, fading, and misprints; applies to both small orders and scaling shop production. |
| Root causes categories | Ink/substrate compatibility; curing dynamics; printer maintenance and color management; transfer process. |
| Color bleed definitions & symptoms | Color bleed = ink spreads beyond intended boundaries; halos/feathering; more likely with oversaturated ink, absorbent media, or slow/uneven curing. |
| Practical troubleshooting approach | Follow a systematic sequence: verify materials, ensure printer maintenance, adjust curing, and test with controlled designs before scaling. |
| Ink & color management | Use the recommended UV DTF ink set; verify ICC profiles; keep nozzle checks clean; avoid degraded cartridges. |
| Substrates & pretreatment | Film, adhesive, and fabric interact with ink; consistent pretreatment affects color stability and definition. |
| Curing dynamics | UV curing must be precise: distance to substrate, lamp intensity, and conveyor speed determine cure; under-cure bleeds, over-cure can crack. |
| Heat & handling | Post-processing heat and washing affect pigment stability; test heat steps per substrate to minimize fade and bleed. |
| Mechanical alignment | Registration errors cause misprints; recalibrate printhead alignment; load media squarely. |
| Troubleshooting steps | Calibration/nozzle check; verify color profile; inspect substrate/pretreatment; revisit curing; control heat; adjust ink density; check alignment; test with controlled designs. |
| Preventive measures | Use quality inks; maintain printheads and curing lamps; standardize pretreatment/substrates; maintain color management; document changes; run routine test prints. |
| When to seek deeper help | If issues persist after methodical adjustments, contact manufacturer support or a color management specialist to explore hardware, firmware, or ink-chemistry causes. |
Summary
UV DTF color bleed troubleshooting is a systematic approach to diagnosing color bleed, fading, and misprints in UV DTF printing. By organizing factors into ink, substrate, curing, heat, and alignment, and by following a structured testing routine, you can achieve consistent results, reduce waste, and build a reliable workflow for high-quality UV DTF prints.